Login
Please note orders placed now will be sent out w/c 22nd April  
Search

Pattern Review • Colette Negroni Menswear Shirt Pattern

Posted on May 11, 2016

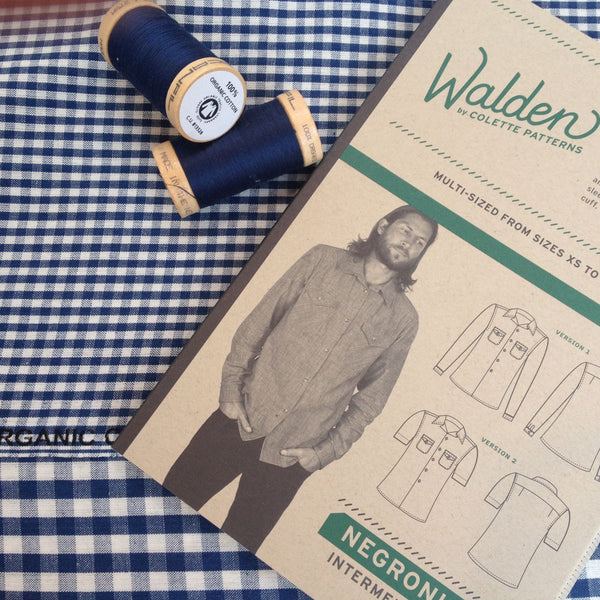
We've just road tested the Colette By Walden Negroni Shirt Pattern, and even if we say so ourselves we're pretty pleased with the end result!
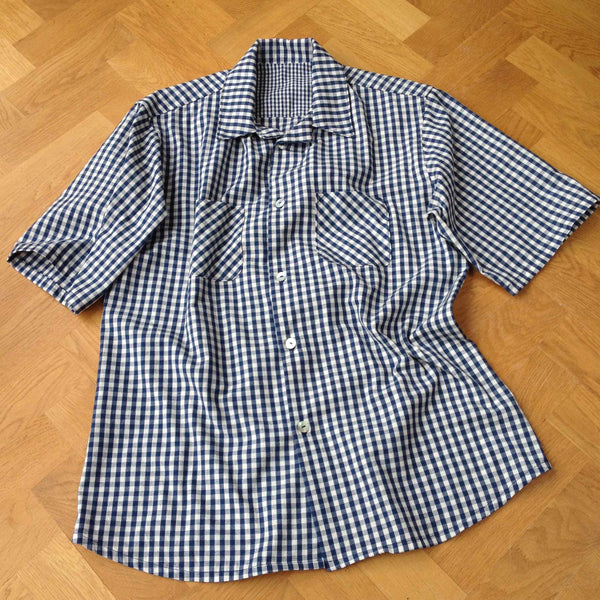
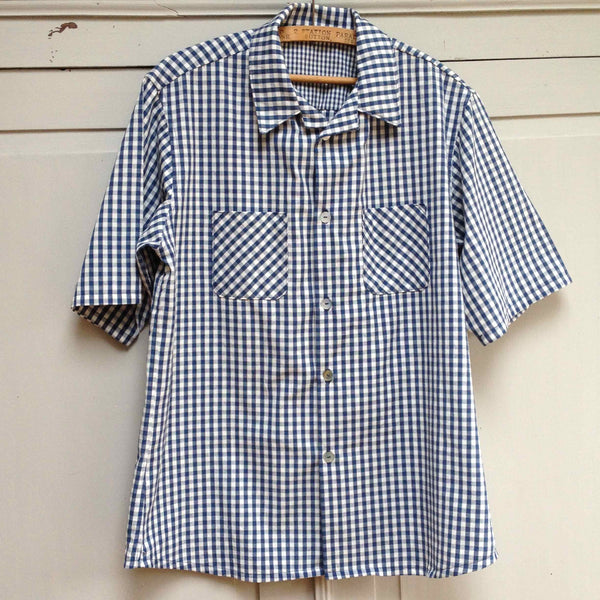
Colette Walden Menswear Negroni Shirt Sewing Pattern For our make, we chose the short sleeved version, but the pattern comes with a long sleeved version too, finished with a placket and cuff. We decided to made ours in our Organic Cotton Gingham in Navy.

Colette Negroni Men's Shirt Sewing Pattern

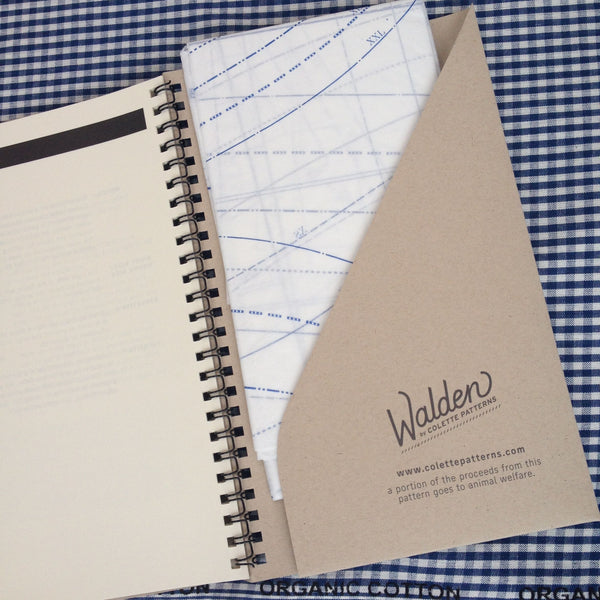
This is the first Colette sewing pattern that we've used and we have to say that we were really impressed. The instructions for the pattern are in a spiral-bound booklet, making it really easy to use, and it has a pocket at the back to store the pattern pieces once you've used them.

Colette Walden Negroni Menswear Shirt Sewing Pattern

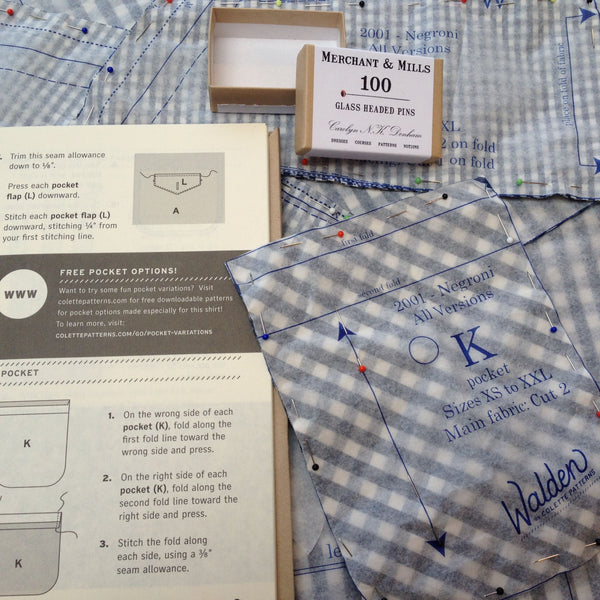
We love that the pattern instructions include lots of ideas for customising your sewing project to make it your own. Plus they also refer you to their website for free downloadable variations, such as the pockets for this shirt.

Colette Walden Negroni Menswear Sewing Pattern

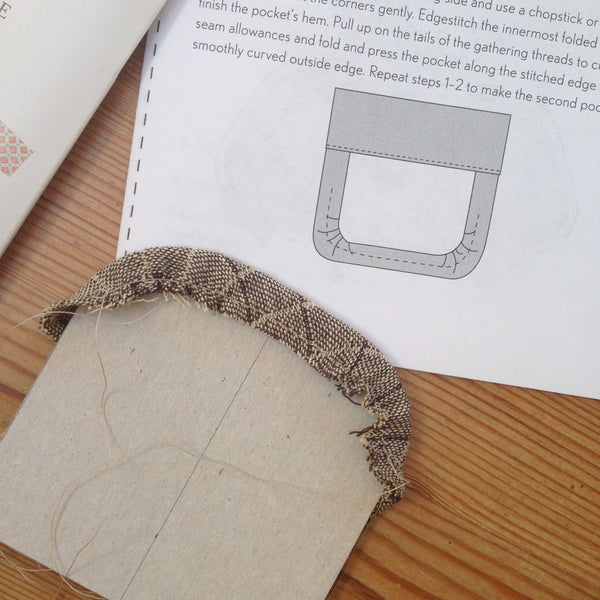
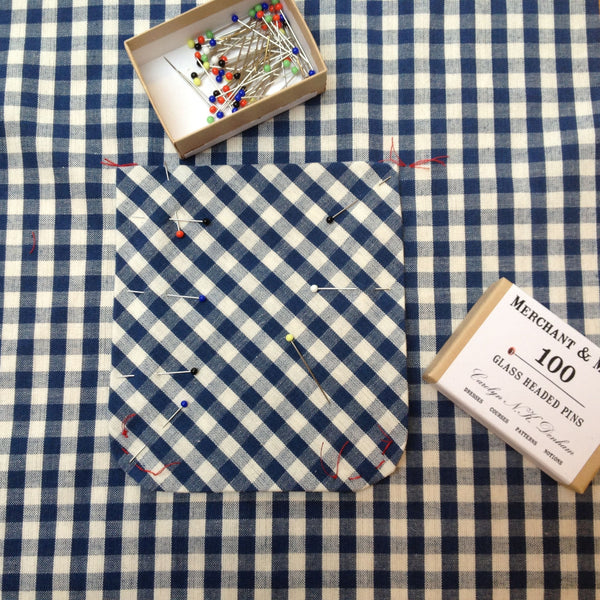
The instructions are really comprehensive, taking you through each step in the process of making a well crafted shirt. The instructions also include handy tips, such as how to make perfectly formed patch pockets by cutting a template out of cardboard to help with pressing, simply make it the same size as your pocket piece, minus the folds and seam allowances as we've done below.

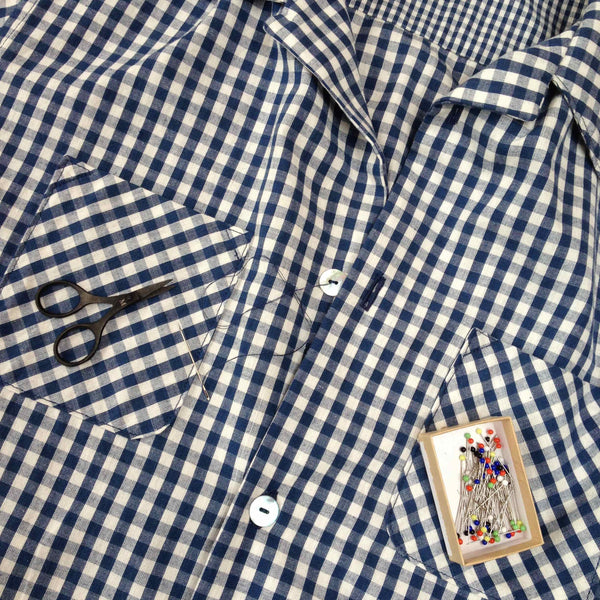
We customised our shirt by cutting the pockets on the bias, as shown below, and we used the Small Check Gingham, again in Navy, for the underside of the collar and the inner back yoke. Even small details like these can take your make to a new level; and give you the chance to get creative!
Colette Negroni Men's Shirt Sewing Pattern

This was the first time we'd tackled a garment with an inner back yoke, however our concerns were soon put to rest, as the step by step instructions and illustrations are really clear and before we knew it the need was done!!

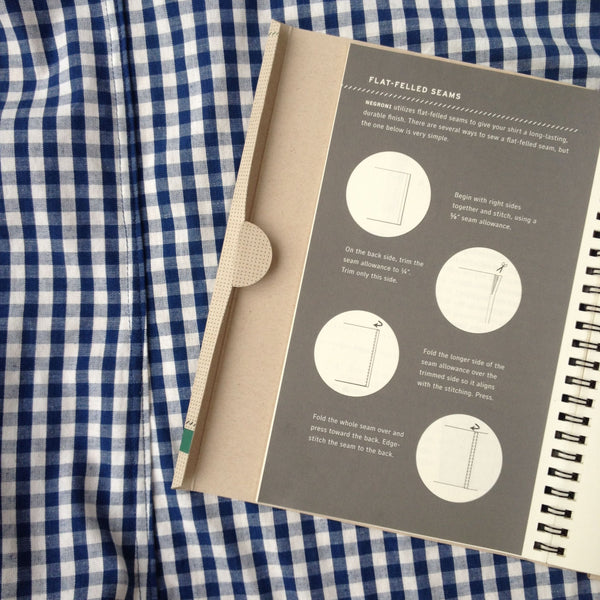
The other sewing process that we tried before was "felled seams" these give a long-lasting durable finish and they also give a look very professional to your garment. Again, there are really good instructions for these, seperated out in the sidebar, so that they can easily be referred to, so nothing to fear!
Colette Negroni Men's Shirt Sewing Pattern

These seams are used for both the sleeve and side seams. Once that's done it's pretty straightforward assuming you've made buttonholes before. It's simply a question of hemming the sleeves and body of the shirt, stitching the buttonholes and attaching the buttons.

Colette Negroni Men's Shirt Sewing Pattern

 Colette Walden Menswear Negroni Shirt Sewing Pattern


Continue reading →

Pattern Review • Merchant and Mill's The Top 64

Posted on April 05, 2016

We've just finished making The Top 64 by Merchant and Mills and we've thoroughly enjoyed making it. 

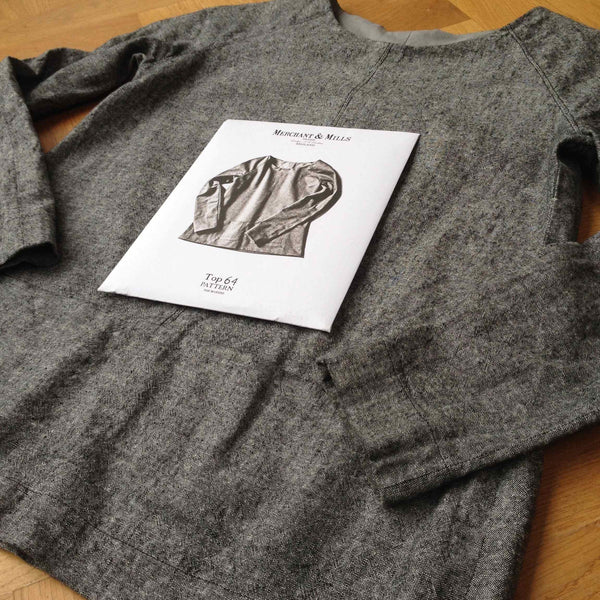
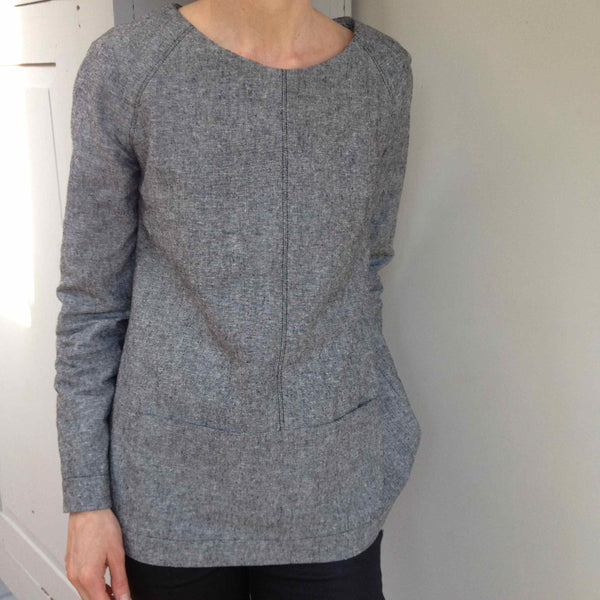
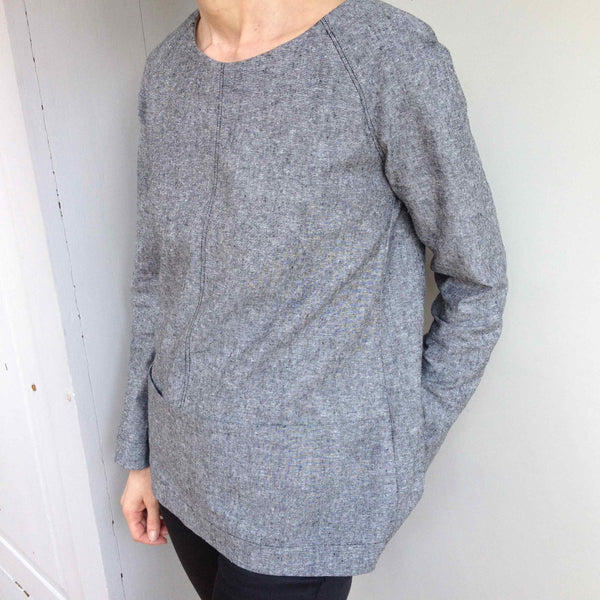
Merchant and Mills The Top #64 Sewing PatternThis style is best described as a work-wear garment, an artists smock or a smart jumper. It features in-seam pockets at the front, along with central seams both front and back and raglan sleeves. It's a feminine take on the style and function of a fisherman's top and we love it!
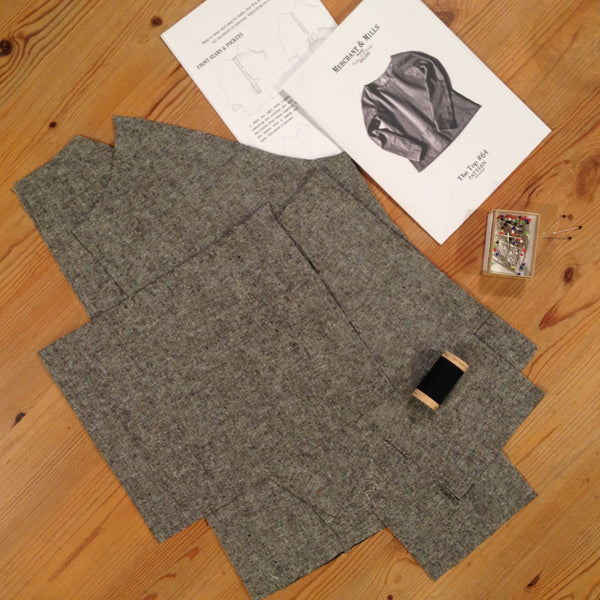
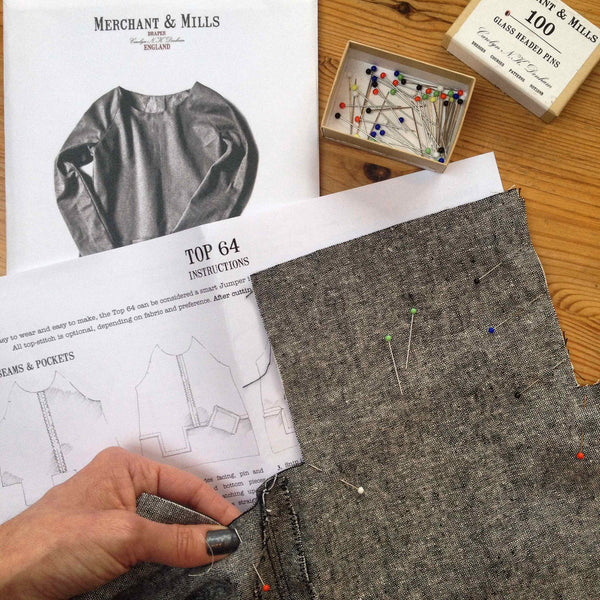
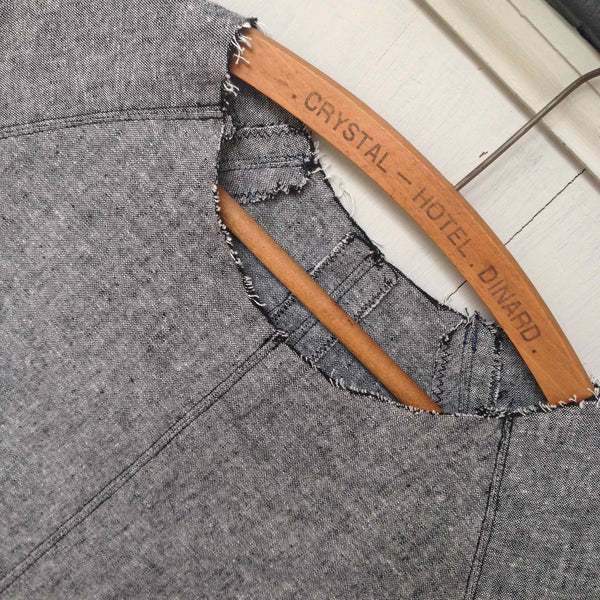
Merchant and Mills The Top 64 in Robert Kaufman's Yarn Dyed Essex Linen

For this style you need a fabric that will hold its shape, so with that in mind we chose to make ours in Robert Kaufman's Yarn Dyed Essex Linen in Black, shown above, it's the perfect weight for this style but has a lovely hand-feel as well.

Merchant and Mills The Top #64 Sewing Pattern

As we've come to expect from the Merchant and Mills sewing patterns, the instructions are clearly laid out and illustrated. And this make was surprisingly easy to sew! It's much easier to make than it looks. The raglan sleeves, for example, are much easier than a set in sleeve, and although there are a lot of pattern pieces, they're all easy to sew together. Plus, you can choose whether or not to top-stitch.

Merchant and Mills The Top #64 Sewing Pattern

Whereas some of the Merchant and Mills patterns have tended to come up a little on the big size, we're really pleased with the fit on this style, the only adjustment made was to shorten the sleeves slightly.

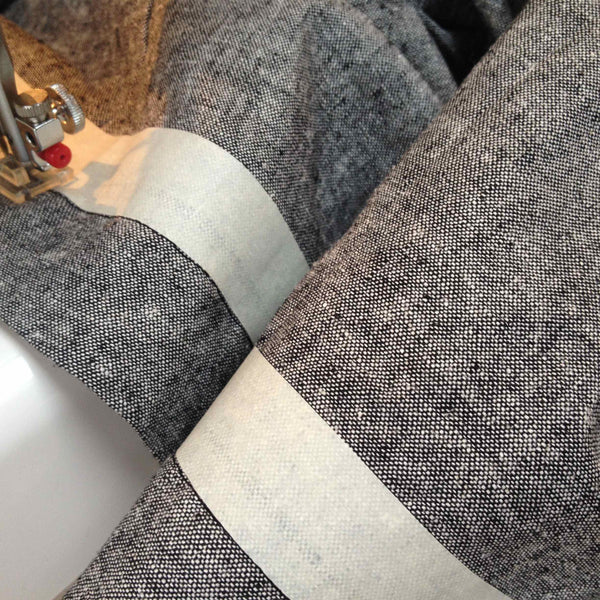
Merchant and Mills The Top #64 Sewing Pattern - Top-stitching

This style lends itself nicely to being top-stitched. We chose to top stitch the central seams, front and back, and the cuff and main hems.You may decide to take it further and top-stitch the bottom panels and the central sleeve seams, or you may prefer not to top-stitch at all.

To get a lovely straight line for our top-stitching we followed Jane, from Jane Makes, advise, and used a low-tack masking tape to mark the stitch-line, which worked a treat!

Merchant and Mills The Top #64 Sewing Pattern

We love how this top has turned out, and it's definitely a style that we'd make again.

Other fabrics that The Top #64 would work well in, as well as any of the other Essex Linens, including the new metallics! This style would also look good in the 8oz Washed Indigo Denim, and you could top-stitch in a traditional gold colour associated with jeans, and the striped Navy & Cream Railroad Denim would also look good too.

Merchant and Mills The Top #64 Sewing pattern

This style would also lend itself well to being adapted, the raglan sleeves are really flattering  and would work well as a short sleeved summer weight top, you might choose to remove the in-seam pockets for this and also possibly the horizontal seam that they're built into.

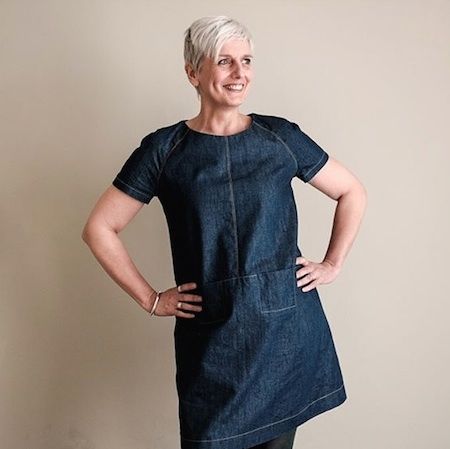
Merchant and Mills The Top #64 Pattern Hack - Dress

By co-incidence, Merchant and Mills have been working on a pattern hack of this style and have made it into a short sleeved dress, which we think looks fantastic, the hack for this will be available on their website very soon.

We hope we've inspired you to try The Top #64 for yourselves! And don't forget we love to see your sewing projects, so please do email us via the contact page with your photos!


SaveSaveSaveSaveSaveSaveSave

Continue reading →

Oliver + S The Carousel Dress

Posted on October 22, 2015

Oliver + S The Carousel Dress Sewing Pattern

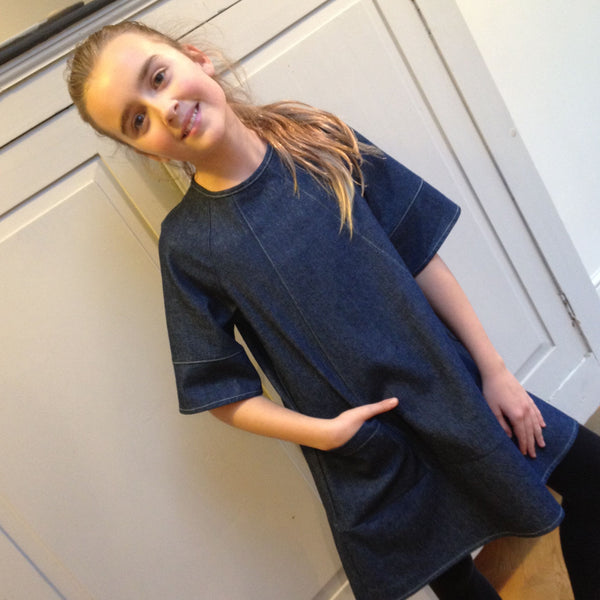
We love the contemporary look of the Oliver + S childrens sewing patterns and have had our eye on The Carousel Dress for some time now! The image on the pattern cover shows the dress being worn by a young girl, however the modern panel pieces and top-stitching make it equally suitable for older girls.

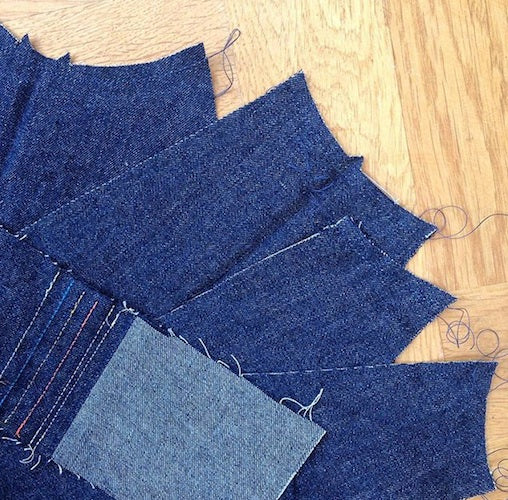
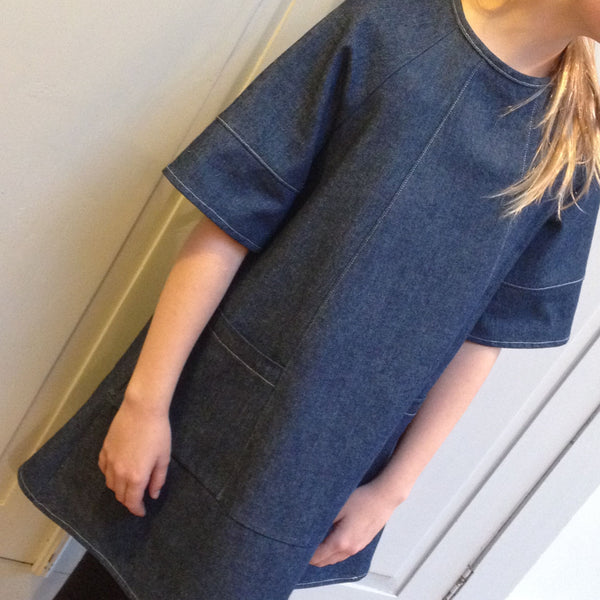
For our first make of this pattern we've used Robert Kaufman's Washed Indigo Denim with contrast stitching for a modern look; and we're making View "B" with the smooth hem panel. This pattern has no buttonholes to contend with or set-in sleeves which makes for an easy sewing project.

Oliver + S The Carousel Dress Sewing Pattern

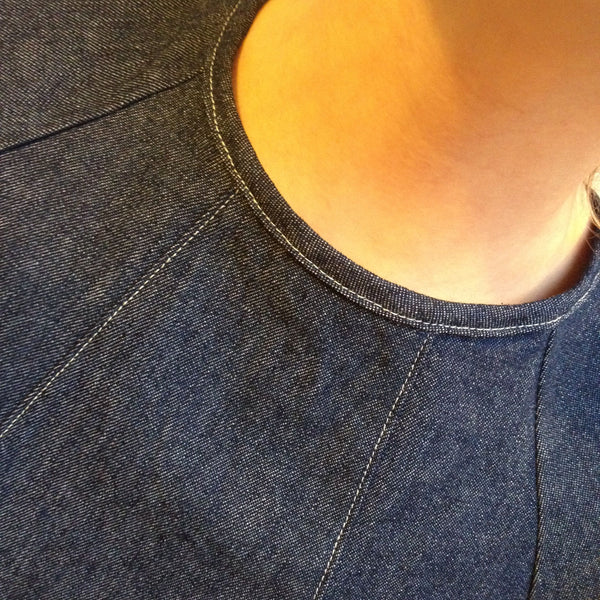
If you're going to top-stitch the dress, it's worth taking the time to experiment with different colours before deciding on the colour to go with. And always worth asking the wearer what she thinks too!

Oliver + S The Carousel Dress Sewing Pattern 

Worth highlighting is the fact that these patterns only have a 1cm seam allowance compared to the more standard 1.5cm, although this is referenced throughout but we thought it worth a mention here too.

Oliver + S The Carousel Dress Sewing Pattern

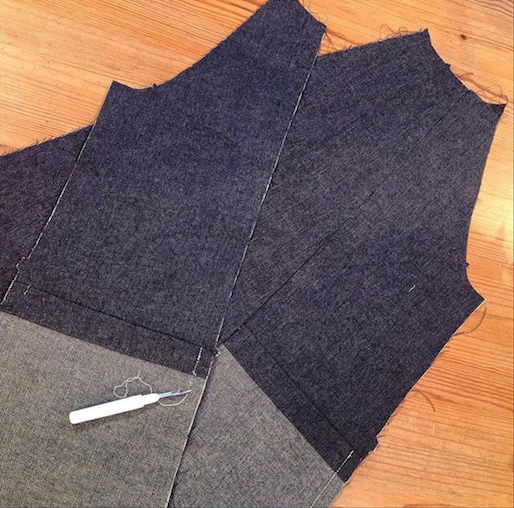
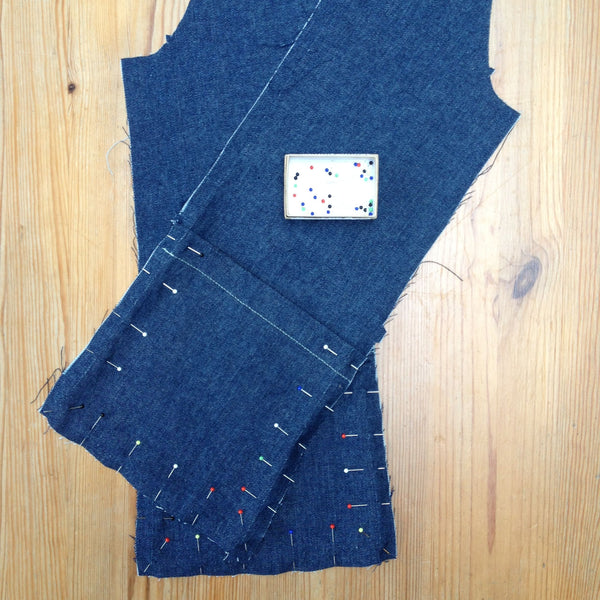
The instructions are well laid out and very clear. That said, do make sure that you're reading the instructions properly, this might sound obvious, but most of the time when we're sewing we're placing the two "right" sides of the fabric together, so do take care when you pin the pockets to the two side panels that you follow the instructions and pin the WRONG side of the pocket to the RIGHT side of the panel piece! Unlike me the first time round, see the photo above for what not to do!! And below is "take two" with the pockets pinned correctly.

Oliver + S The Carousel Dress Sewing Pattern

Oliver + S The Carousel Dress Sewing Pattern

Other than that our make was pretty straightforward, and came together fairly quickly. We decided against the top-stitching round the hem panel, as for this project we felt it was just a little too much.

Oliver + S The Carousel Dress Sewing Pattern

The button at the back neck is secured with a thread chain loop, this is really easy to do and looks really effective. For detailed instructions click here.

Oliver + S The Carousel Dress Sewing Pattern

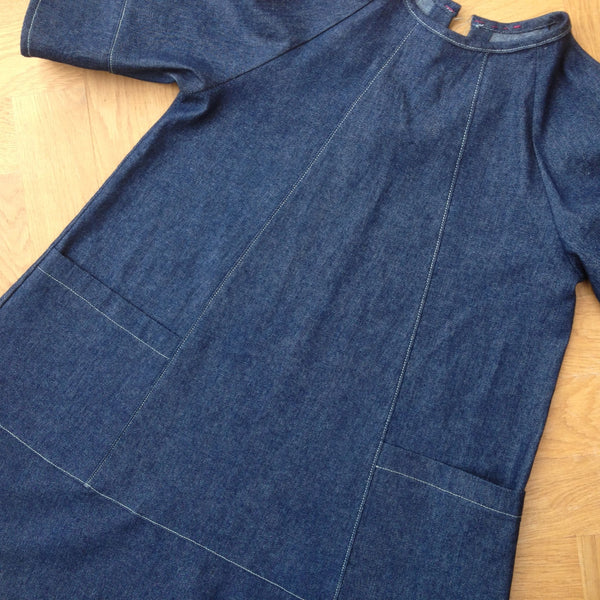
We really enjoyed making this pattern and love the end result. This is a style that you could make over and over; and depending on your fabric choices it would look different every time! It would look great for instance in Robert Kaufman's striped Navy & Cream Railroad Denim, or one of our Organic Cotton Ginghams.  A Colour-blocked version in our Organic Cotton Crossweaves would also work really well, as would a patterned version with solid colour cuffs and hem. 

As you can see the possibilities really are limitless! We'd love to see how you make yours, so do send your photos in via the email address in our contact page.


Continue reading →

Oliver + S • Lullaby Layette Set Trousers Pattern Review

Posted on July 30, 2015

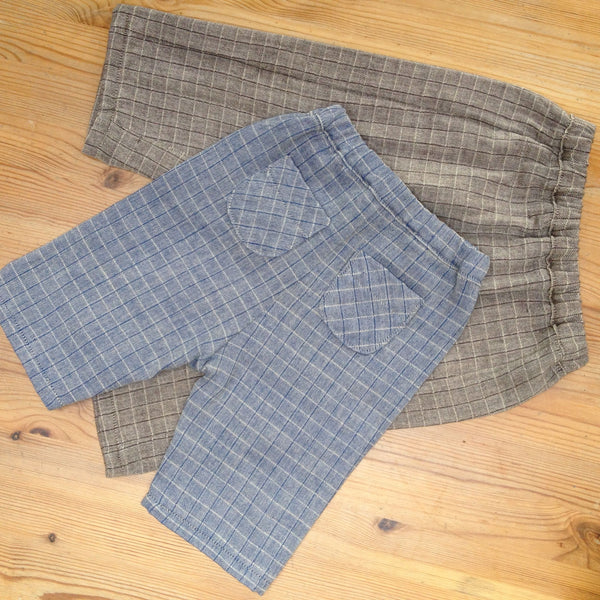
With our friends little boy's first birthday fast approaching, we've the perfect excuse to try out the trousers from the Lullaby Layette Set by Oliver + S! And what better fabric to make them in than our beautifully soft 100% Organic Double Cloth, we've made ours up in both the Blue and the Brown. Because this fabric is organic it doesn't contain any harmful chemicals or dyes, making it ideal for babies and young children as well as adults!

Oliver + S Lullaby Layette Set | The Draper's Daughter

We strongly recommend that you trace off the patterns so that you can re-use it again and again as baby grows. The other thing to note is that these patterns only have a 1cm seam allowance compared to the more standard 1.5cm, this is referenced throughout but we thought worth a mention.

These trousers are really straightforward and easy to make, the instructions are clear and come with helpful illustrations to assist you at each stage of your make.

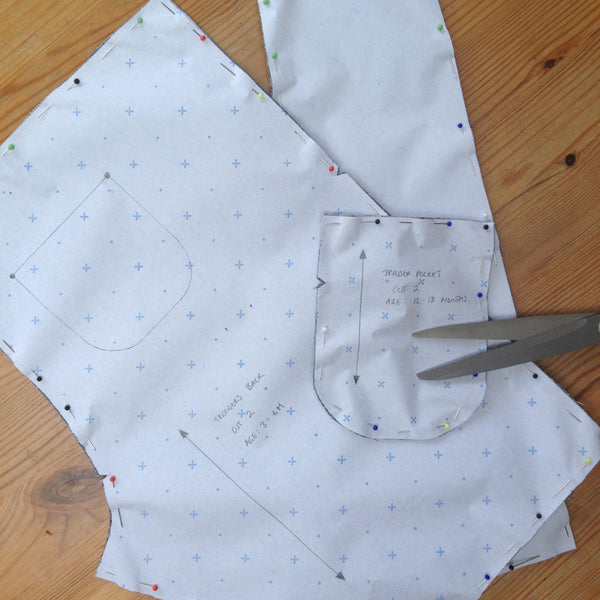
Take time with the pockets to ensure that they are even, we used a tip we picked up when making up one of our adult Colette patterns, and made a template out of card of the shape of the finished pocket so that we could gather the curved end section of pocket evenly and then press before stitching to the back sections of the trousers. For a patterned fabric you may even decide to leave the pockets off making this an even easier make!

 Oliver + S Lullaby Layette Set | The Draper's Daughter

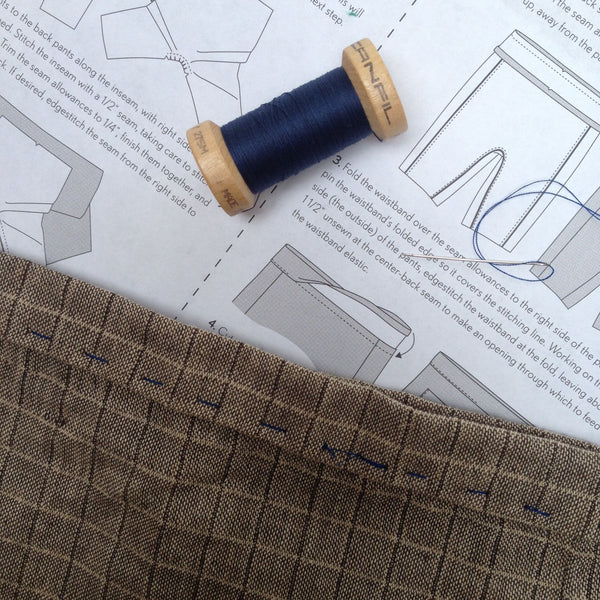
 When it comes to top-stitching the waistband to the front of the trousers we tacked it in place rather than just pinning, to ensure that we covered the stitch line where the waistband is attached to the back of the garment.

Oliver + S Lullaby Layette Set | The Draper's Daughter

Once the waistband's on all that's left to do is turn up the trouser hems and you're done!

Oliver + S Lullaby Layette Set | The Draper's Daughter

These are so easy to make we're sure you'll want to make them again and again! Why not try them in our Organic Crossweaves or Ginghams, Robert Kaufman Chambray Union Herringbone or Woven Stripe, or the Nani Iro for Kokka's Sen Ritsu would look lovely for a girl with a hint of shimmer.


Continue reading →

Merchant and Mills • The Camber Set Dress

Posted on May 12, 2015

We loved making the top version of this so much that we're revisited The Camber Set by Merchant & Mills, this time to make the dress.

Merchant & Mills The Camber Set in Nani Iro for Kokka Mountain Views

As we mentioned in our first blog about making the top, this pattern really lends itself to using a contrasting fabric for some of the pattern pieces. With that in mind, for this make we decided to use Nani Iro for Kokka's Mountain Views in Grey and we've chosen to add some contrasting panels in our 100% Organic Cotton Crossweave in the Dark Grey. As I'm sure you'll have gathered by now we love a bit of grey!

Merchant & Mills The Camber Set in Nani Iro for Kokka Mountain Views

 Initially we were only going to make the front neck binding in the contrasting fabric but when we started to sew the pieces together we decided to contrast the back yoke as well.

Merchant & Mills The Camber Set in Nani Iro for Kokka Mountain Views

Merchant & Mills The Camber Set in Nani Iro for Kokka Mountain Views

Merchant & Mills The Camber Set in Nani Iro for Kokka Mountain Views

This pattern has already become a firm favourite and one which we plan to make again and again. Because of it's simple silhouette and understated panels, it's a style that you can easily make several times in different fabrics, and each time it'll look totally different.

For our next make, we're thinking we'll make it in Robert Kaufman's Washed Indigo Denim, and reverse out the denim for the front neck binding and the sleeves to create a subtle contrast!

Continue reading →

 
Scroll to top